

Complete the setup wizard
Add your photo, import your brand, pick a template and fill in your card in a few minutes after you sign up.
On this page
The setup wizard opens after you create your account, verify your email and choose a plan. It walks you through your company’s look and your own card details, with a live preview so you can see the result as you go.
Before you start
The wizard is for people who signed up themselves and are the admin of their new organisation. If your company created your account for you, you skip the wizard. See Your company gave you a CloudCard: start here.
The wizard has up to three tabs at the top: Step 1 (your company’s card), Step 2 (your own card) and, on paid plans, Step 3 (inviting colleagues).
Step 1: Your company’s card
The first time you open Step 1, a short guided overlay appears.
- On Welcome, {your name}!, click Next.
- On Add your profile photo, click Upload and choose a PNG, JPG, JPEG or WebP image. Click Next. You can skip this and add a photo later.
- CloudCard tries to import your brand automatically from the website domain in your email address. If it can’t, you’ll see Would you like us to import your brand?, which lists Brand Colours, Company Logo, Company Social Media and Company Address.
- Click Yes, import brand elements to try, or No, I’ll do it myself to skip.
- On Add a promotional banner, upload an image or video, or pick a ready-made banner. Use the tabs (Industrial, Real Estate, Financial Services and so on) to browse. Click Next.
- On Select your preferred template, choose Template 1 or Template 2. A live preview of your card appears beside it.
- Click Review.
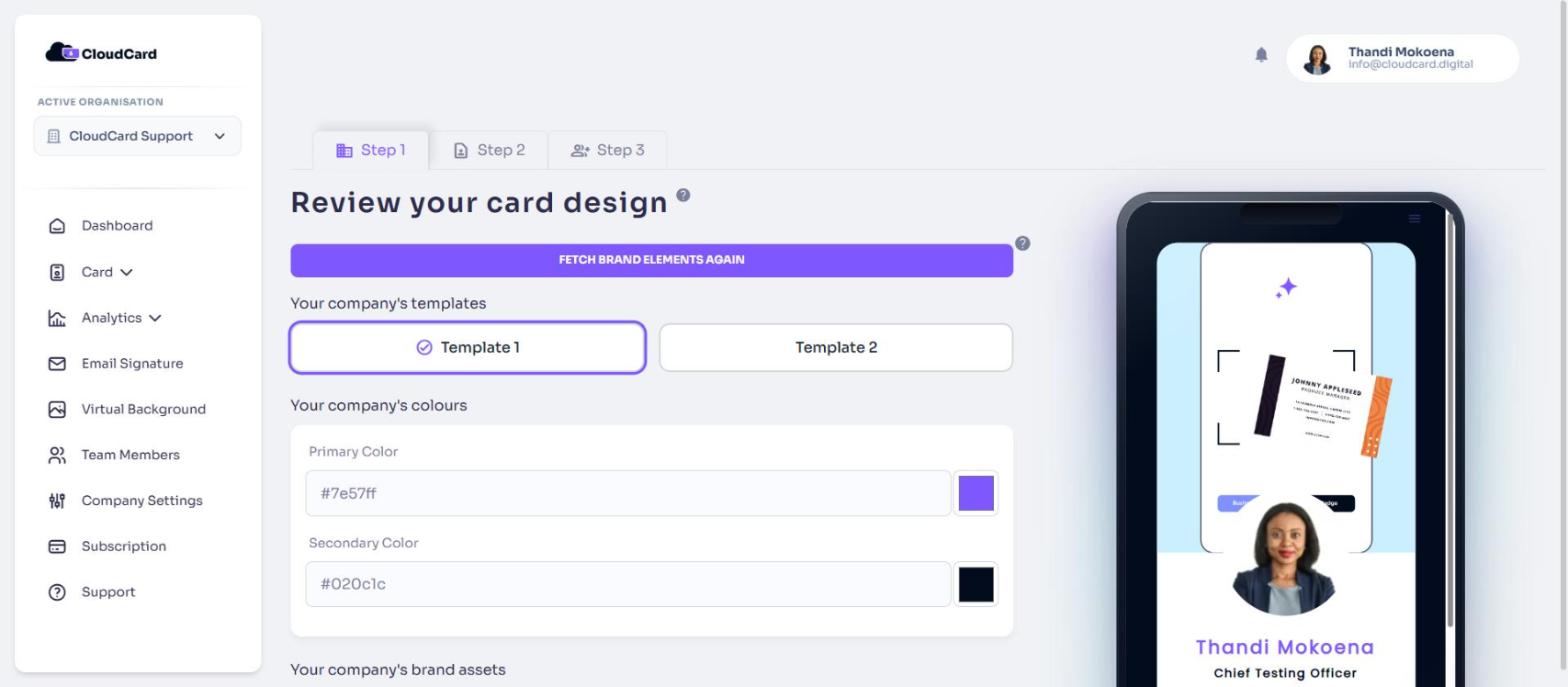
You’ll now see Let’s design your card (or Review your card design if your brand was imported). Anything you change here applies to every card in your company, and saves as you go.
- Click Import Brand Elements if you want to try the brand import again.
- Under Your company’s templates, switch templates if you like.
- Under Your company’s colours, set the Primary Color and Secondary Color. Type a hex code or use the colour picker.
- Under Your company’s brand assets, upload Your logo, Your background image (or pick a background colour), and Your promotional banner.
- Under Your company’s call-to-action (CTA), set the Call to action text and Call to action link. This is the button visitors see on your card.
- Check the preview, then click Next.
Step 2: Your own card
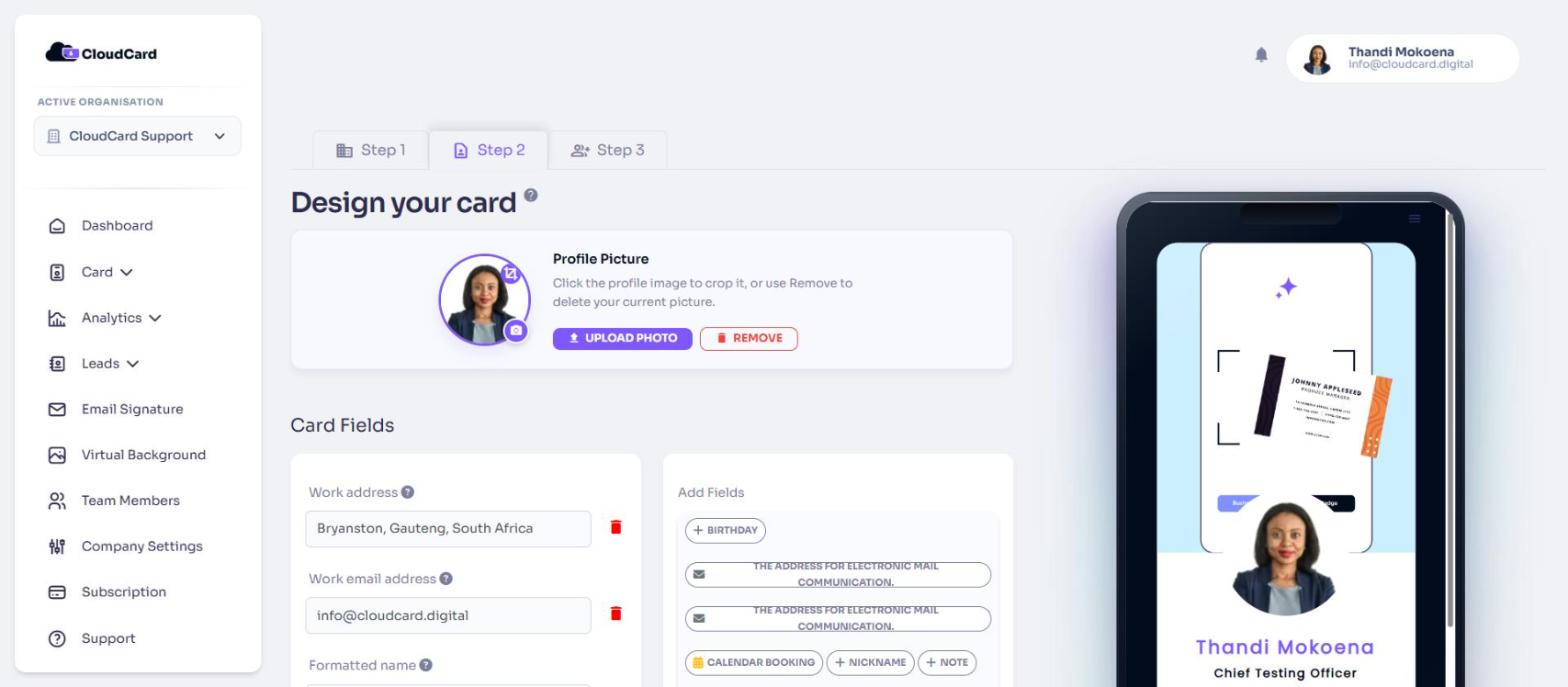
Design your card changes only your personal card.
- Under Profile Picture, click Upload Photo to add or change your photo. Crop it and click Crop & Save, or click Use Original.
- Under Card Fields, check the details already on your card. Your name, work email, mobile number and job title are filled in from sign-up. To remove a field, click the red bin icon, then Confirm & Delete.
- Under Add Fields, click a field such as Website, LinkedIn or WhatsApp, type the value and confirm it. You’ll see Saved! in the corner.
- Click Next to go to Step 3. On the Free plan, click Finish instead. You’ll land on your dashboard.
Step 3: Invite your team
Step 3 appears on paid plans only.
- Under Invite a team member, enter their First name, Last Name, Job title, Email address and Phone number.
- Click Invite and create card. Each person gets an email with a link to set their password.
- Repeat for anyone else. They appear under Current team members.
- When you’re done, click the button at the bottom right to complete setup. You’ll land on your dashboard.
You can also add people later, one at a time or in bulk. See Roll out CloudCard to your team.
After the wizard
Everything you set in the wizard can be changed later:
- Your own details: Edit your card details
- Company branding, colours and templates: Set up your company branding
- Seeing your finished card: View your card as others see it
Was this article helpful?
Thanks for letting us know.
Still stuck?
Send us a message and we'll know which article you were reading. Or email [email protected].