

Set up your company branding
Add your logo, background, colours and promotional banner so every card in your organisation matches your brand.
ForAdmins
On this page
Your company branding is shared by every card in your organisation. Change it once and everyone’s card updates.
You’ll usually set this up in the setup wizard when you first create your account. You can change it any time in Company Settings.
Change your branding
- In the left-hand menu, click Company Settings.
- Make sure Template Settings is selected on the left.
- Choose your Primary color and Secondary color. Click a colour circle to pick a colour, or type a hex code such as
#7E57FFin the box next to it. - Scroll down to Branding Assets and upload any of these:
- Logo: PNG, JPG or WebP. SVG isn’t supported.
- Background Image: PNG, JPG, GIF or WebP.
- Promotional Banner (optional): an image, or an MP4 or WebM video.
- Click Save Settings.
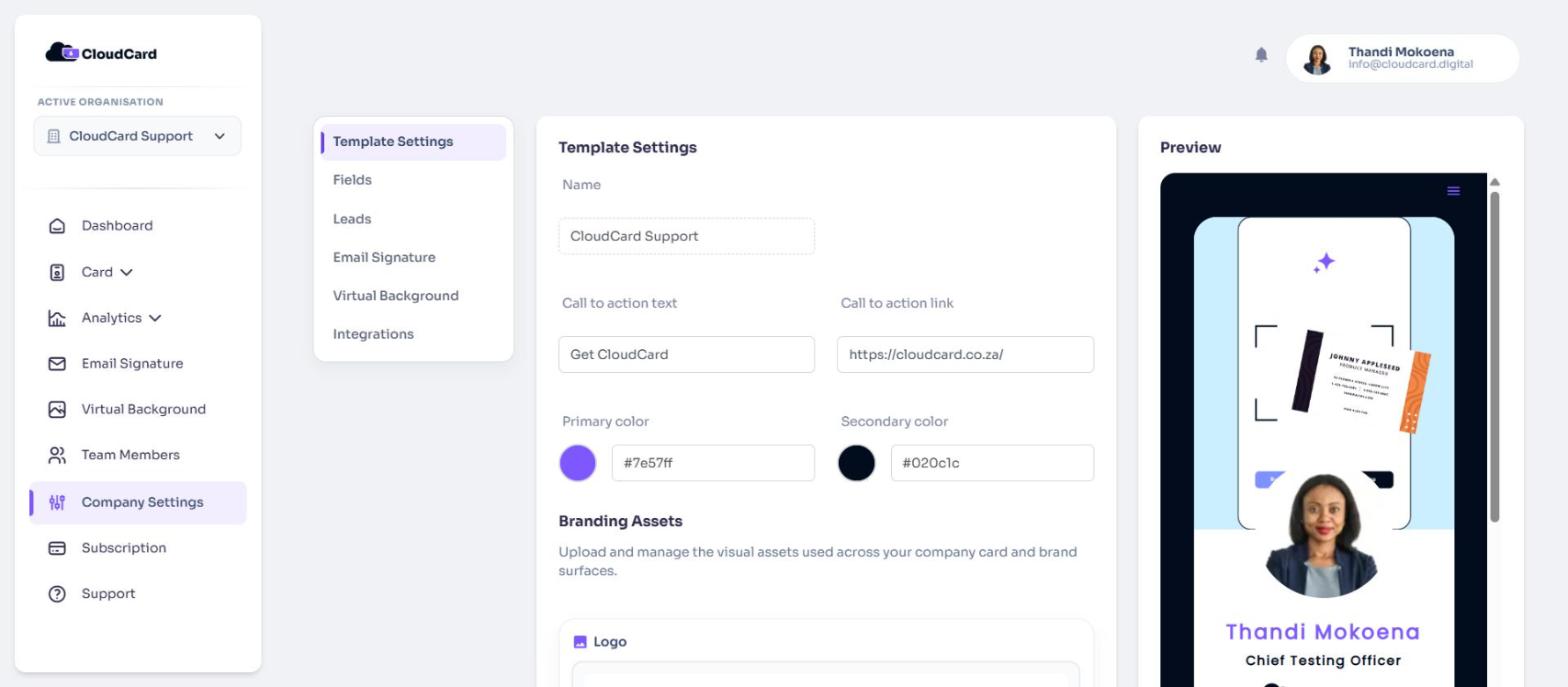
You’ll see “Organisation updated” and every card in your organisation now uses the new branding.
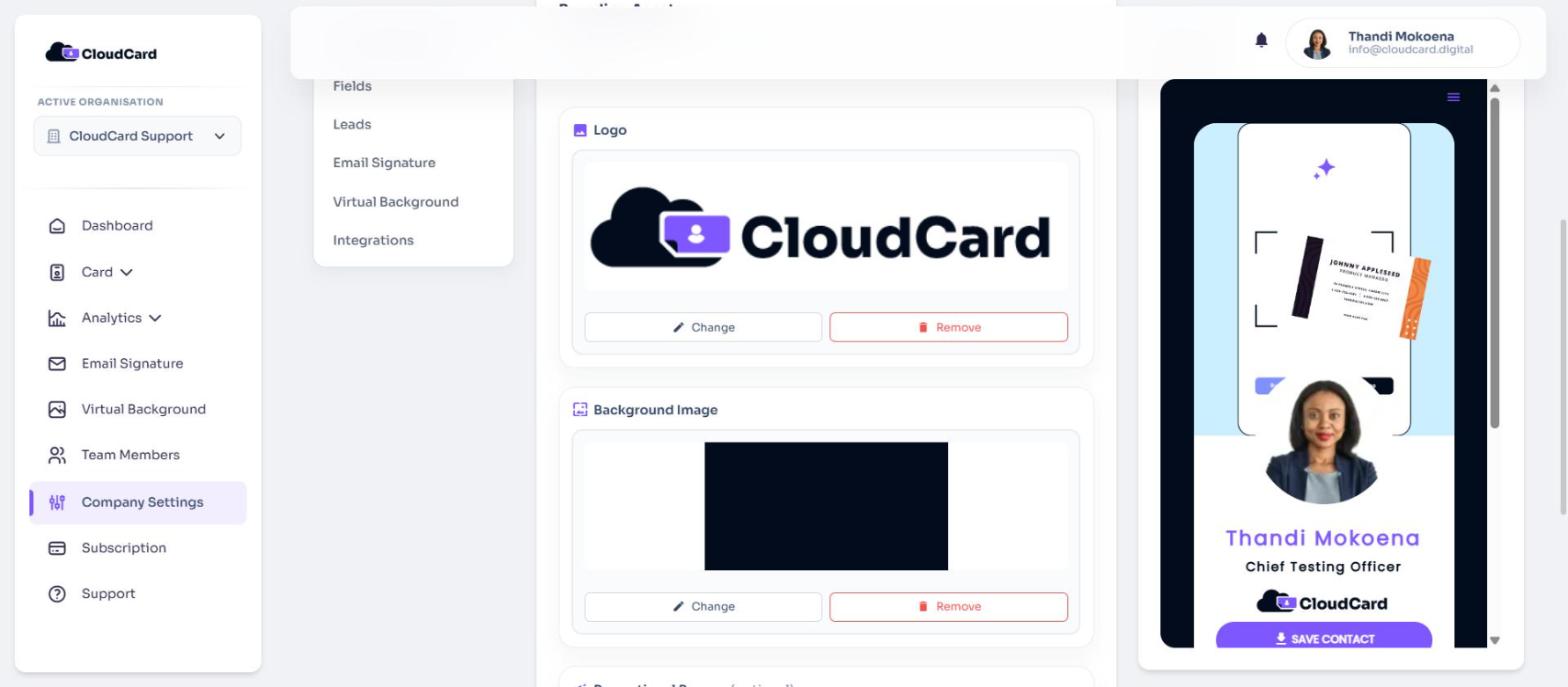
Check the preview
The Preview on the right shows a card from your organisation. Colour and text changes appear in it as you type. New images only appear after you click Save Settings.
Change or remove an image
Under each uploaded image, click Change to upload a different one, or Remove to delete it. Then click Save Settings.
Good to know
- Each file can be up to 20 MB. Smaller files load faster on phones. See Recommended image sizes and file types.
- The Classic card template doesn’t show a promotional banner, so the banner upload is greyed out when your organisation uses Classic. See Choose a card template.
- The primary colour is also used for the call-to-action button. See Set the call-to-action button.
Import your brand automatically
In the setup wizard, Import Brand Elements looks up your company from the domain of your email address. It fills in your logo, colours, a background and a banner where it can find them. Always review the result: if something is missing or wrong, upload it yourself as described above. See Complete the setup wizard.
Was this article helpful?
Thanks for letting us know.
Still stuck?
Send us a message and we'll know which article you were reading. Or email [email protected].