

Connect Microsoft Entra ID
Link your Microsoft Entra ID directory to CloudCard so new staff get cards automatically and can sign in with Microsoft.
PlansProPremiumCompare plans
ForAdmins
On this page
Connecting Microsoft Entra ID (formerly Azure Active Directory) lets CloudCard read the people and groups in your Microsoft directory. Once it’s set up, CloudCard can create cards for new staff automatically, keep their details and roles up to date, and let them sign in with their Microsoft account.
Setting it up has three parts: register CloudCard in Azure, save the connection in CloudCard, then choose which groups to sync.
Before you start
- You need the Admin role in CloudCard.
- You need someone who can create app registrations and grant admin consent in your organisation’s Microsoft Entra ID, usually your IT administrator.
- New cards use cards on your plan. Check you have enough for the people you’ll sync. See Add more cards to your plan.
Part 1: Register CloudCard in Azure
Open the CloudCard setup page first, so you can copy the redirect address from it: in CloudCard, click Company Settings, choose Integrations, then click Set up Entra ID on the Microsoft Entra ID card. The Azure Portal button on that page opens App registrations in a new tab.
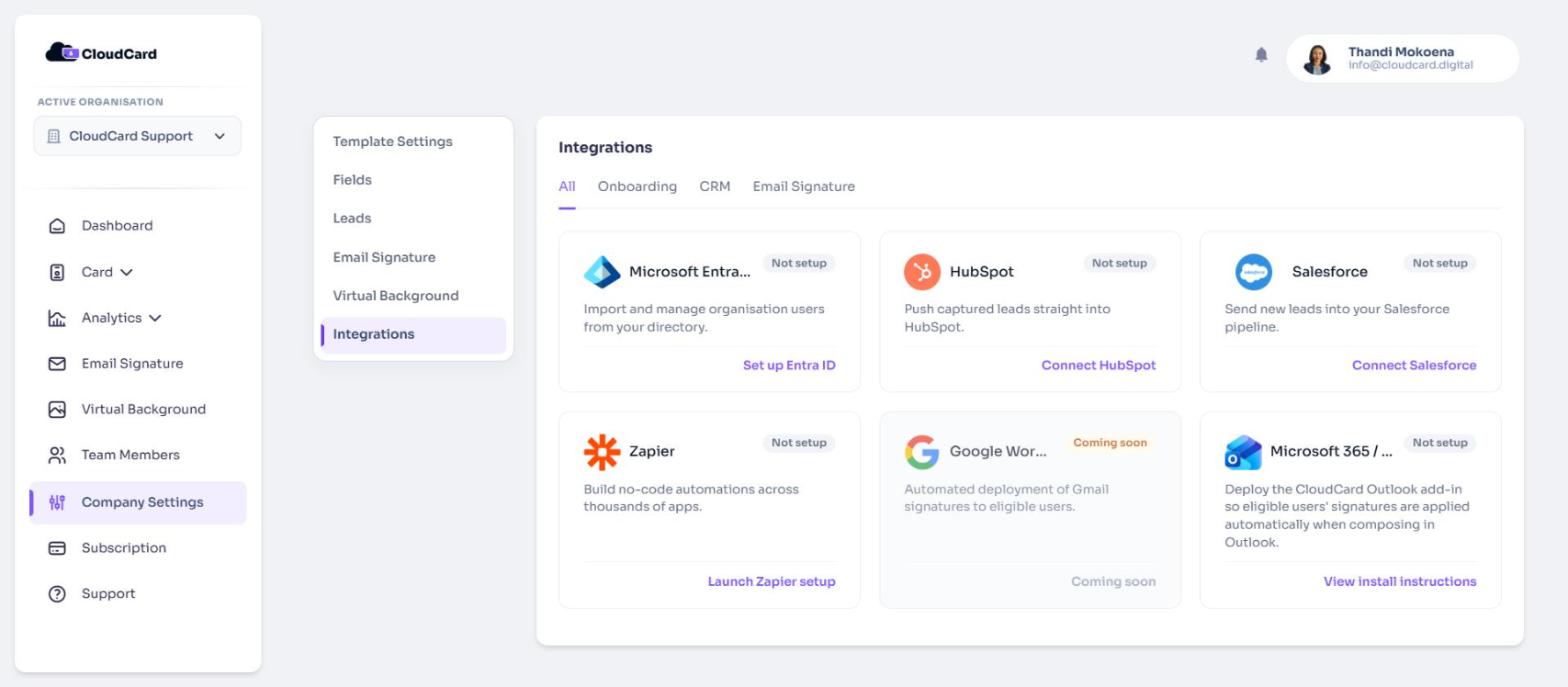
In the Azure portal:
- Go to App registrations and add a new registration for CloudCard. You can leave the redirect URI blank at this point.
- On the app’s Overview page, copy the Application (client) ID and the Directory (tenant) ID. Keep them for Part 2.
- Under Authentication, add a Web redirect URI. Copy the exact address shown in step 3 of the setup instructions on the CloudCard page. It is
https://app.cloudcard.co.za/auth/providers/azure/callback. This is what makes Microsoft sign-in work. - Under Certificates & secrets, create a new client secret. CloudCard recommends an expiry of 12 months. Copy the secret’s Value straight away; Azure only shows it once.
- Under API permissions, add the Microsoft Graph Application permissions Group.Read.All and User.Read.All.
- Click Grant admin consent for those permissions. Without consent, CloudCard can’t read your directory.
Part 2: Save the connection in CloudCard
- Back on the Connect Microsoft Entra ID page in CloudCard, fill in Application (client) ID and Directory (tenant) ID.
- Paste the secret into Client secret value.
- Under Client secret expires in, choose the same expiry you picked in Azure. CloudCard can’t read this from Microsoft, so it uses your choice to warn you before the secret runs out.
- Choose your automation options. If you’re not sure, tick Automatically add new users from Active Directory and the hourly data transfer, and leave the rest for now. Each option is explained in Entra ID sync options.
- Click Save.
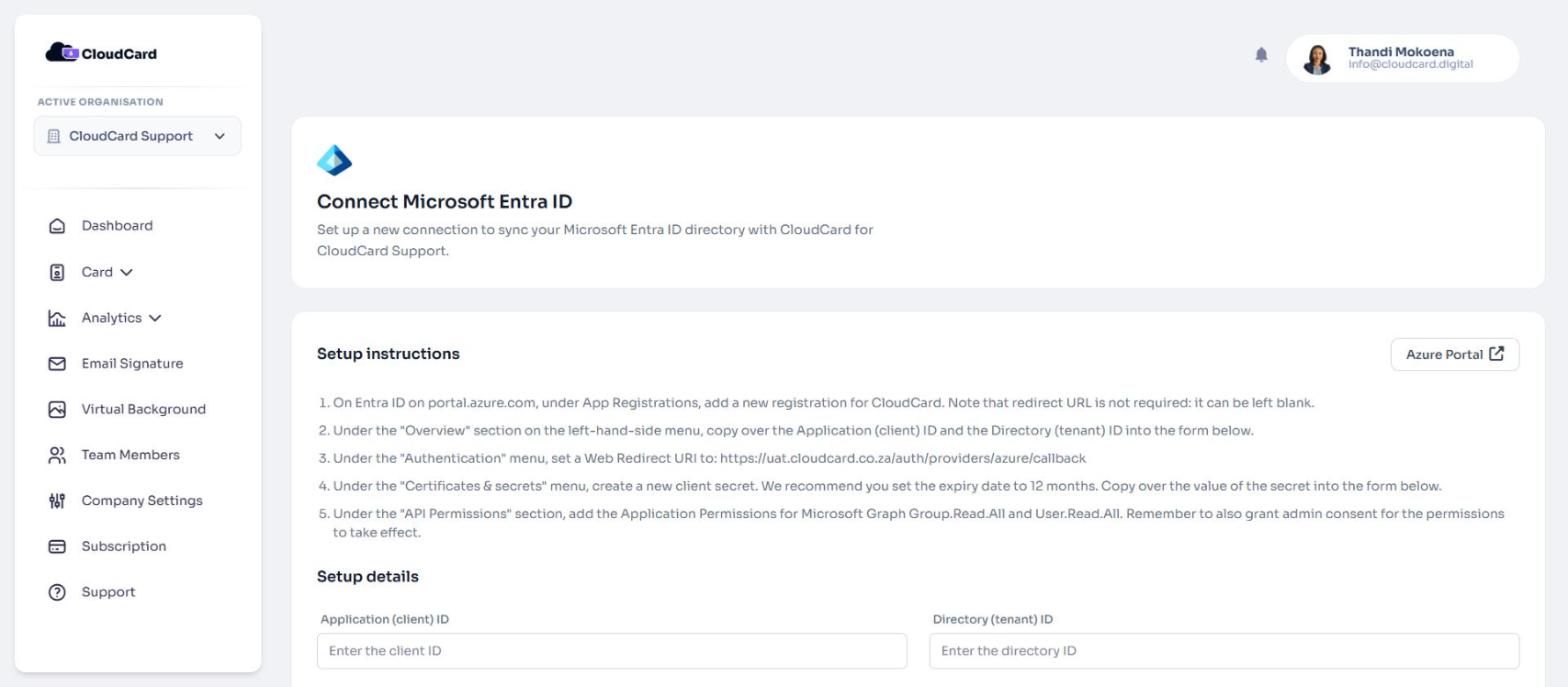
CloudCard checks the details with Microsoft. If they’re right, you’ll see “Credentials stored” and the Microsoft Entra ID page shows Connected. If you see “Invalid credentials”, check the IDs and secret value and try again.
Saving the connection doesn’t add anyone yet.
Part 3: Choose groups and sync
- On the Microsoft Entra ID page, click Groups and roles.
- Tick the groups whose members should get CloudCard, and choose a role for each.
- Click Save groups and roles, then confirm.
CloudCard creates accounts and cards for the people in those groups and emails each of them an invitation. Full details are in Manage roles with Entra ID groups.
Related
Was this article helpful?
Thanks for letting us know.
Still stuck?
Send us a message and we'll know which article you were reading. Or email [email protected].