

Deploy signatures to Outlook with Microsoft 365
Roll out the CloudCard Outlook add-in once from the Microsoft 365 admin center so your team's signatures are applied for them in Outlook.
PlansPremiumEmail SignatureCompare plans
ForAdmins
On this page
The CloudCard Outlook add-in puts each person’s CloudCard signature into Outlook for them, so nobody has to copy and paste. A Microsoft 365 administrator deploys it once for your whole organisation. Individual users don’t install anything.
Before you start
- You need to be a CloudCard admin of the organisation.
- Outlook deployment is included in the Premium and Email Signature plans. On Pro, it’s available once you’ve added Email Signature licences. See Add or cancel Email Signature licences. On other plans the Microsoft 365 / Outlook card shows an upgrade panel.
- The people who should get a signature need the Email Signature role in CloudCard. See Email Signature users and seats.
- Each person’s CloudCard email address must match the address they sign in to Microsoft 365 with. That’s how the add-in finds their signature.
- Someone with admin rights in the Microsoft 365 admin center does the final deployment. If that’s not you, CloudCard can email them the steps.
1. Open the Outlook page in CloudCard
- In the left-hand menu, click Company Settings.
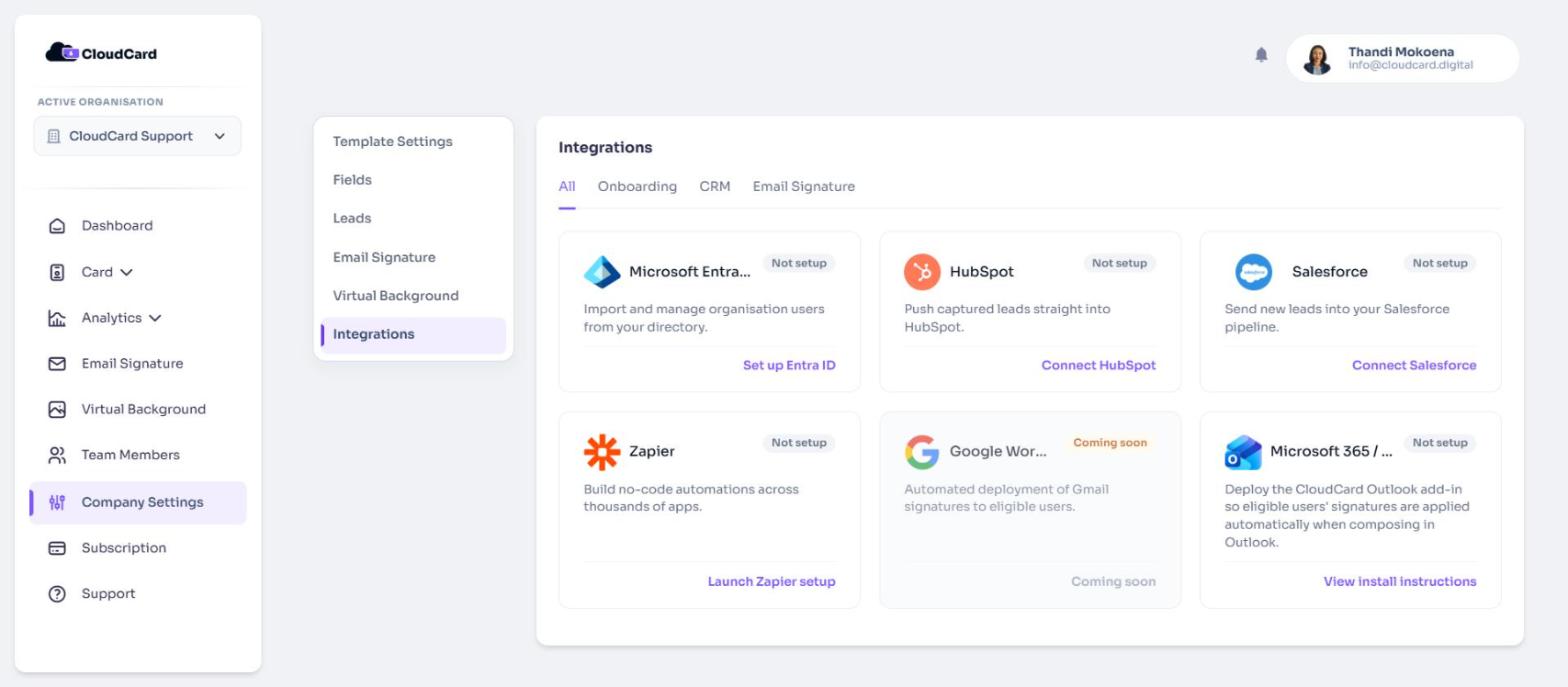
- Click Email Signature, then click Automated Signature Deployment. This takes you to Integrations, filtered to Email Signature.
- On the Microsoft 365 / Outlook card, click View install instructions.
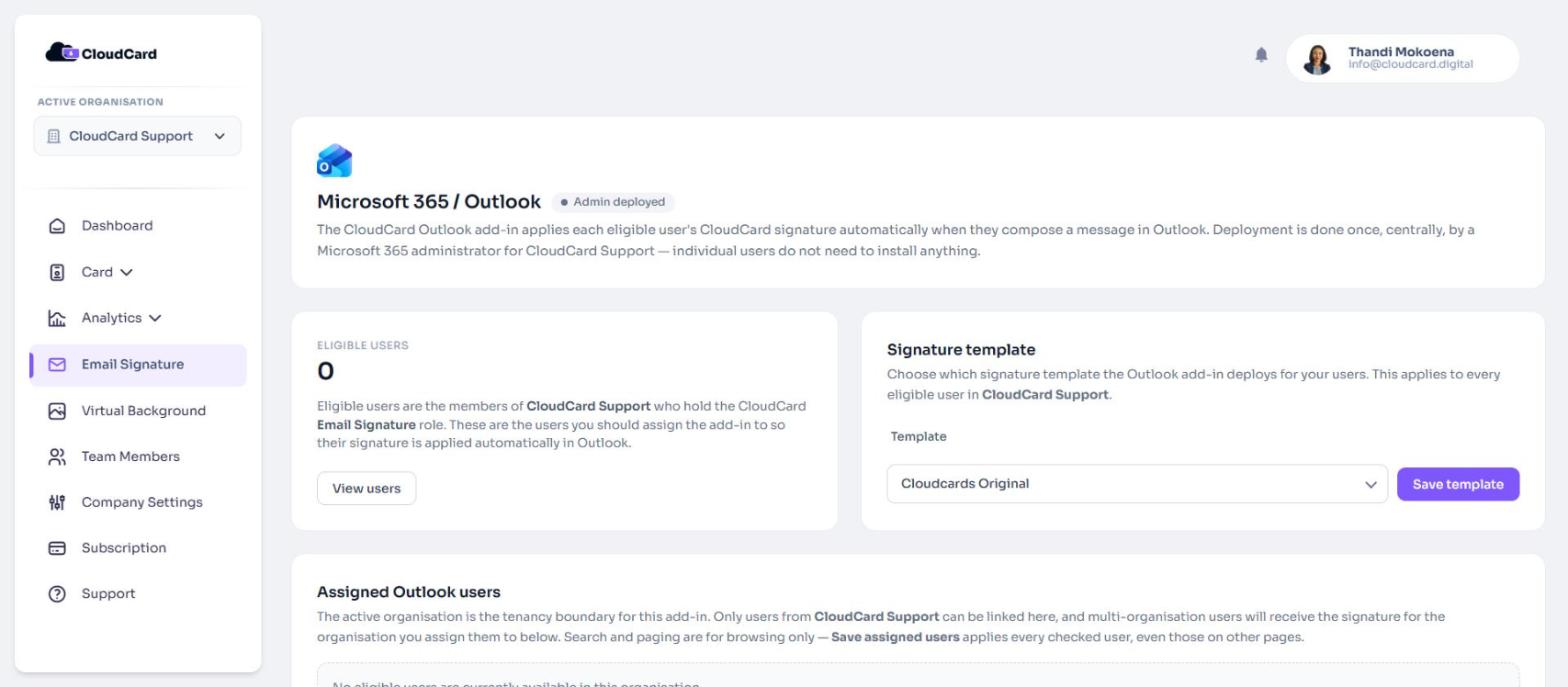
The Microsoft 365 / Outlook page opens. Eligible users shows how many people in the organisation have the Email Signature role. Click View users to see them.
2. Choose the signature template
- Under Signature template, choose a template from the Template list.
- Click Save template.
This template is used for everyone the add-in serves. Saving it also switches on Global Email Signature Management with the same template, so the Email Signature page shows your team that template only. See Choose one signature template for everyone.
3. Assign users in CloudCard
- Under Assigned Outlook users, tick each person who should get the signature in Outlook. Use Search by name or email, Select all and Deselect all to move faster.
- Click Save assigned users. This saves every ticked person, including people on other pages of the list.
4. Deploy the add-in in Microsoft 365
Under Your add-in package, click Copy manifest URL, or click Download manifest (.xml) to save the file.

Then, in the Microsoft 365 admin center (Microsoft’s screens may change over time):
- Go to Settings > Integrated apps.
- Click Upload custom apps.
- Set App type to Office Add-in, choose Provide link to manifest file and paste the manifest URL.
- Assign the add-in to the same people you ticked in CloudCard.
- Review the permissions and accept. The add-in only asks for access to the message being written, so it can insert the signature. It doesn’t read your email or send its content to CloudCard.
- Click Finish deployment.
Not the Microsoft 365 admin?
Under Not the Microsoft 365 admin?, click Send instructions to your admin, enter their address in Microsoft 365 admin email and click Send instructions. CloudCard emails them the deployment steps and the manifest link.
What your team sees in Outlook
Once the rollout reaches them, the signature is added in Outlook on the web, the new Outlook for Windows, and Outlook for Mac. Depending on how the add-in is set up, it’s either added automatically when they start a new email, or they click Apply signature in the CloudCard group on the compose ribbon. The note at the bottom of the deployment steps on the CloudCard page tells you which applies.
Because the add-in fetches the signature when it’s needed, changes to someone’s card or to your signature settings show up without anyone redeploying.
Add or remove people later
Tick or untick people under Assigned Outlook users and click Save assigned users. Make the same change to the add-in’s assignments in the Microsoft 365 admin center. Unticking someone stops new signatures being applied for them.
Turn it off
Your Microsoft 365 admin removes or disables the CloudCard add-in under Integrated apps in the Microsoft 365 admin center.
If a signature doesn’t appear
- Wait for the 72-hour rollout window to pass.
- Check the person is ticked under Assigned Outlook users and still has the Email Signature role.
- Check that the email address on their CloudCard account matches their Microsoft 365 sign-in.
- Check they’re assigned the add-in in the Microsoft 365 admin center.
Still stuck? Contact support.
Was this article helpful?
Thanks for letting us know.
Still stuck?
Send us a message and we'll know which article you were reading. Or email [email protected].